About Knowvation
Knowvation™ is a web-based, file type agnostic, full-text search and retrieval content management system. Knowvation™ allows organizations to store, search, retrieve, browse and manage a diverse set of content/digital objects within one easy to use system.
Search
Basic Search Options
Boolean Search
A primary query type that accepts queries constructed with Boolean logic. The default operator between query terms is AND. A query for term1 term2 is logically equivalent to a query for term1 AND term2.
The stemmed query terms are used to compare against stemmed terms in the index. For example, the query term territorial could be stemmed to the base term of territor and the query term legislature could be stemmed to the base term of legislat. As a result, a Boolean Search for territorial legislature could match results with terms such as legislative territory.
No semantic term expansion occurs in this type of search. For example, a Boolean Search using the query term intelligent would not match the indexed term smart.
Refer to the Boolean Operators table below for details on constructing queries using Boolean logic.
Concept Search
A primary query type that accepts plain English queries without Boolean Operators. Semantic expansion is automatically performed on all query words. For example, a Concept Search using the query term territory could find documents containing the indexed term district. Documents that contain all of the query terms (in either their original form or their expanded form) will be returned in the results.
The Concept Search type does not recognize Boolean Operators (such as + - AND or OR). For example, a Concept Search for territory AND legislative could return results containing all of these words:
- territory (or any expanded version of this term, such as district)
- AND
- legislative
In this case, the word AND is considered a search term, not a Boolean Operator.
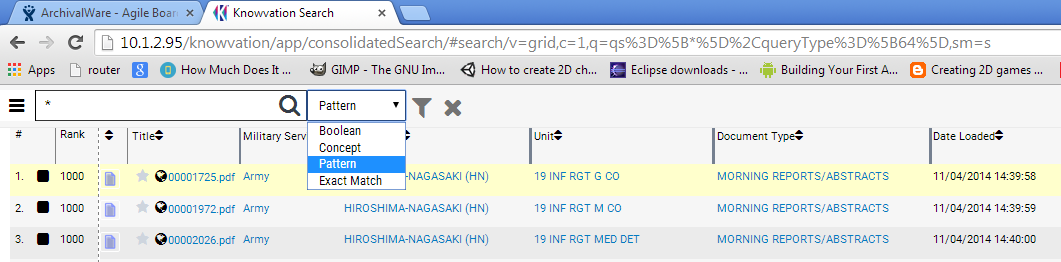
Pattern Search
A primary query type that processes plain English queries, but tolerates spelling differences in either the body of the text or the queries. Pattern expansion is automatically performed on all query words to the level specified in the "Pattern Search, Similarity Setting" preference.
Exact Search
A primary query type used to find exact matches for query terms. The query terms are not stemmed or expanded in any way. Queries using Boolean logic are accepted. The default operator between query terms is AND; thus, a query for term1 term2 is logically equivalent to a query for term1 AND term2.
In the Exact search type, a search for territorial will match ONLY the word territorial. Thus, a search for territorial legislature would find documents containing those two exact terms. Some of the results may coincidentally also contain stemmed versions of these terms, but those terms would not be considered matched terms, and would not be highlighted as such.
The Exact Search type provides a way to find documents with ONLY the desired terms. For example, to find all documents that contain the exact terms territorial legislature but do not also contain the exact terms legislative territory, use an Exact Search for territorial legislature -legislative -territory. Note: the order of the query terms does not matter.
Refer to the Boolean Operators table below for details on constructing queries using Boolean logic.
Wildcard Characters
Wildcard characters allow you to search for multiple terms at once or to find words with unknown or incorrect spelling. Use wildcard characters (*, ?, [search expression], ^, -, <, >, ~) to substitute for the part of the word, name, or number that varies among the terms in the index.
Wildcard characters are best used with Exact Search type. Although they can be used with Concept Search or Keyword Search types, these searches may yield unexpected results due to the stemming and semantic expansion of the terms. Wildcard characters are ignored in the Pattern Search type.
Wildcards can be used in full text search or field entries, in multiple words, and even multiple times in one word. For the most relevant results, if you are looking for "unknown" information within a field, it is best to perform the wildcard search within that field.
| Wildcards | Description | Example |
|---|---|---|
| * | match anything or nothing | comput* |
| ? | match exactly one character | wom?n |
| ^ | match any character except the next character | /199[^7]/ |
| [ ] | search expression; can include a hyphen to indicate a range of letters or numbers; will match only one character within the brackets | /199[1-5]/ |
| < | search expression; the "less than" symbol (<) is used to express a lower value. | < 200 |
| > | search expression; the "greater than" symbol (>) is used to express a higher value. | > 200 |
| " " | phrase search; find terms in the order given. | "chief executive officer" |
| ~ | search expression; find terms near eachother | chief officer of any type: "chief officer"~3 |
| [* TO *] | search expression; range query. | [100 TO 200]
[100 TO *] [NOW TO *] [2013-11-04T10:05:00Z TO NOW-1DAY] [ape TO apple] |
Boolean Operators
| Operator | Description | Syntax |
|---|---|---|
| AND && |
match terms on both sides of the operator | term1 AND term2
term1 && term2 |
| OR || |
match one or both terms on either side of the operator | term1 OR term2
term1 || term2 |
| + | term1 must be present in the result | +term1 |
| NOT - |
match term1, but do not match term2 | term1 NOT term2
term1 -term2 |
| ( logical expression ) | treat the logical expression between the parens as one unit | term1 NOT ( term2 OR term3 ) |
Advanced search options:
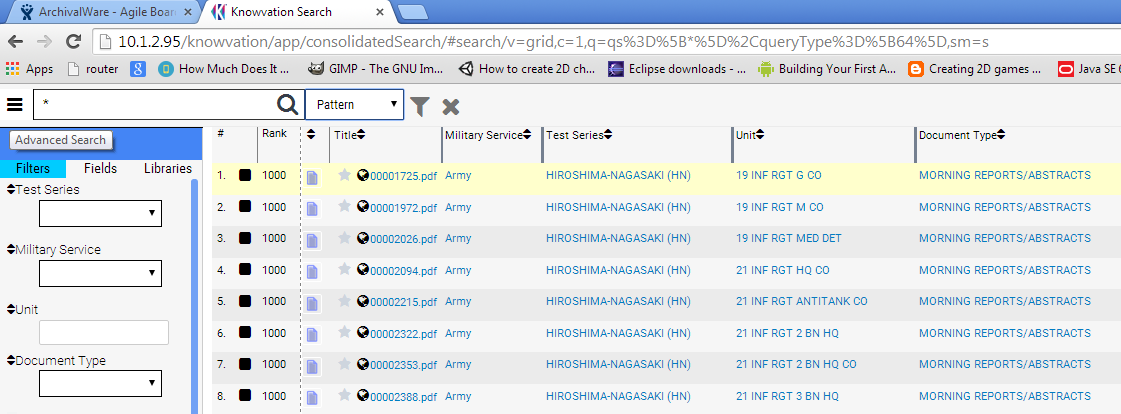
Fielded Search ("Filters" tab selected)
A query performed against the document metadata, it limits responses by allowing you to enter specific metadata fields (such as a full or partial title, collection, author, etc.). A metadata field search can be done against metadata only (one or more fields at a time) or in conjunction with a full-text search.
Fields
Specific fields made available for the fielded search and result list can be selected under the fields tab. Placing a check mark in the box next to the field under the results tab then selecting update will make it available for the results list. Placing a check mark in the box next to the field under the search tab then selecting update will make it available for fielded search.
Reordering Fields
You can rearrange fields as you desire by dragging and dropping fields in the left panel:
- go to left panel of advanced search
- select fields tab
- drag fields to rearrange:
search tab will reorder filters result tab will reorder columns and fields in result view
Libraries
Expand or limit your search by including or excluding libraries from the list shown. Note that if you do not have permission to search a particular library, it will not be shown in the list. To include a library in your search, check the box beside that library.
Facets
Under the advanced search panel, there can be multiple facets that allow you to narrow down the file(s) you are looking for. An example of a facet is "Meta Format" or "Year". If you search for a document and you see multiple years listed, you can select one of the years which can help you narrow your search.
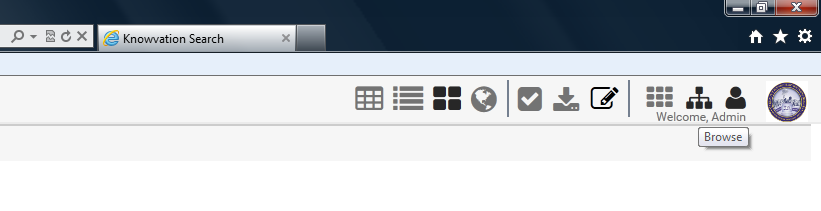
Browse
Allows you to browse through designated browse fields in all documents. For example, documents may have a test series (browse1) as part of the metadata, so you can browse in a specific folder where you will find documents belonging to that test series. Selecting the caret to the left of the test series in this example would expand browse levels below that top level (browse2-4). Selecting the highlighted browse field will yield the resulting documents at that level. Additional options may be displayed to the right of each one depending on the user's permissions. Show more displays a browse only view.

Results View/Format
The user can choose which format to view his results in by selecting column format, row format, thumbnail format, or the map view. Additionally, format can be predefined in user preferences.
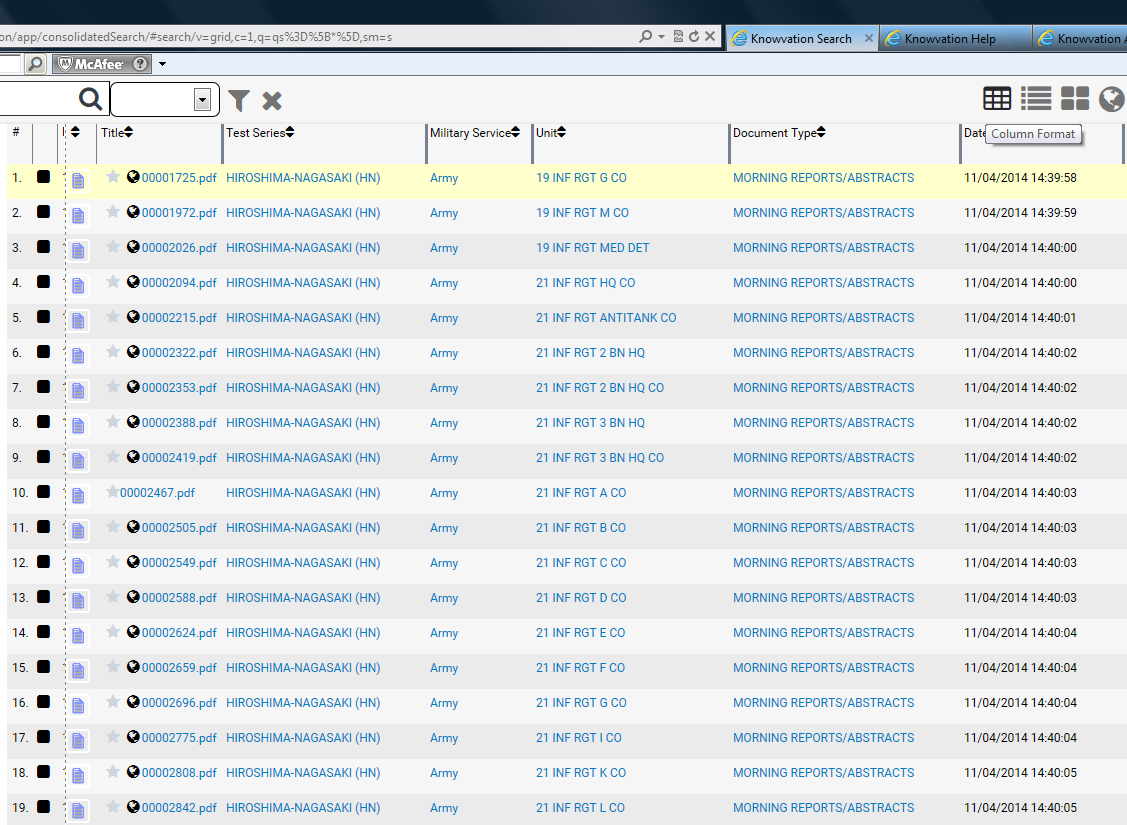
Column Format
Search results will be displayed in a table with metadata columns (x-axis) and documents (y-axis).
Row Format
Results will display in a list of metadata values.
Thumbnail Format
Results will display as large picture icons with the filename in a matrix (suitable for Photograph collections).
Map
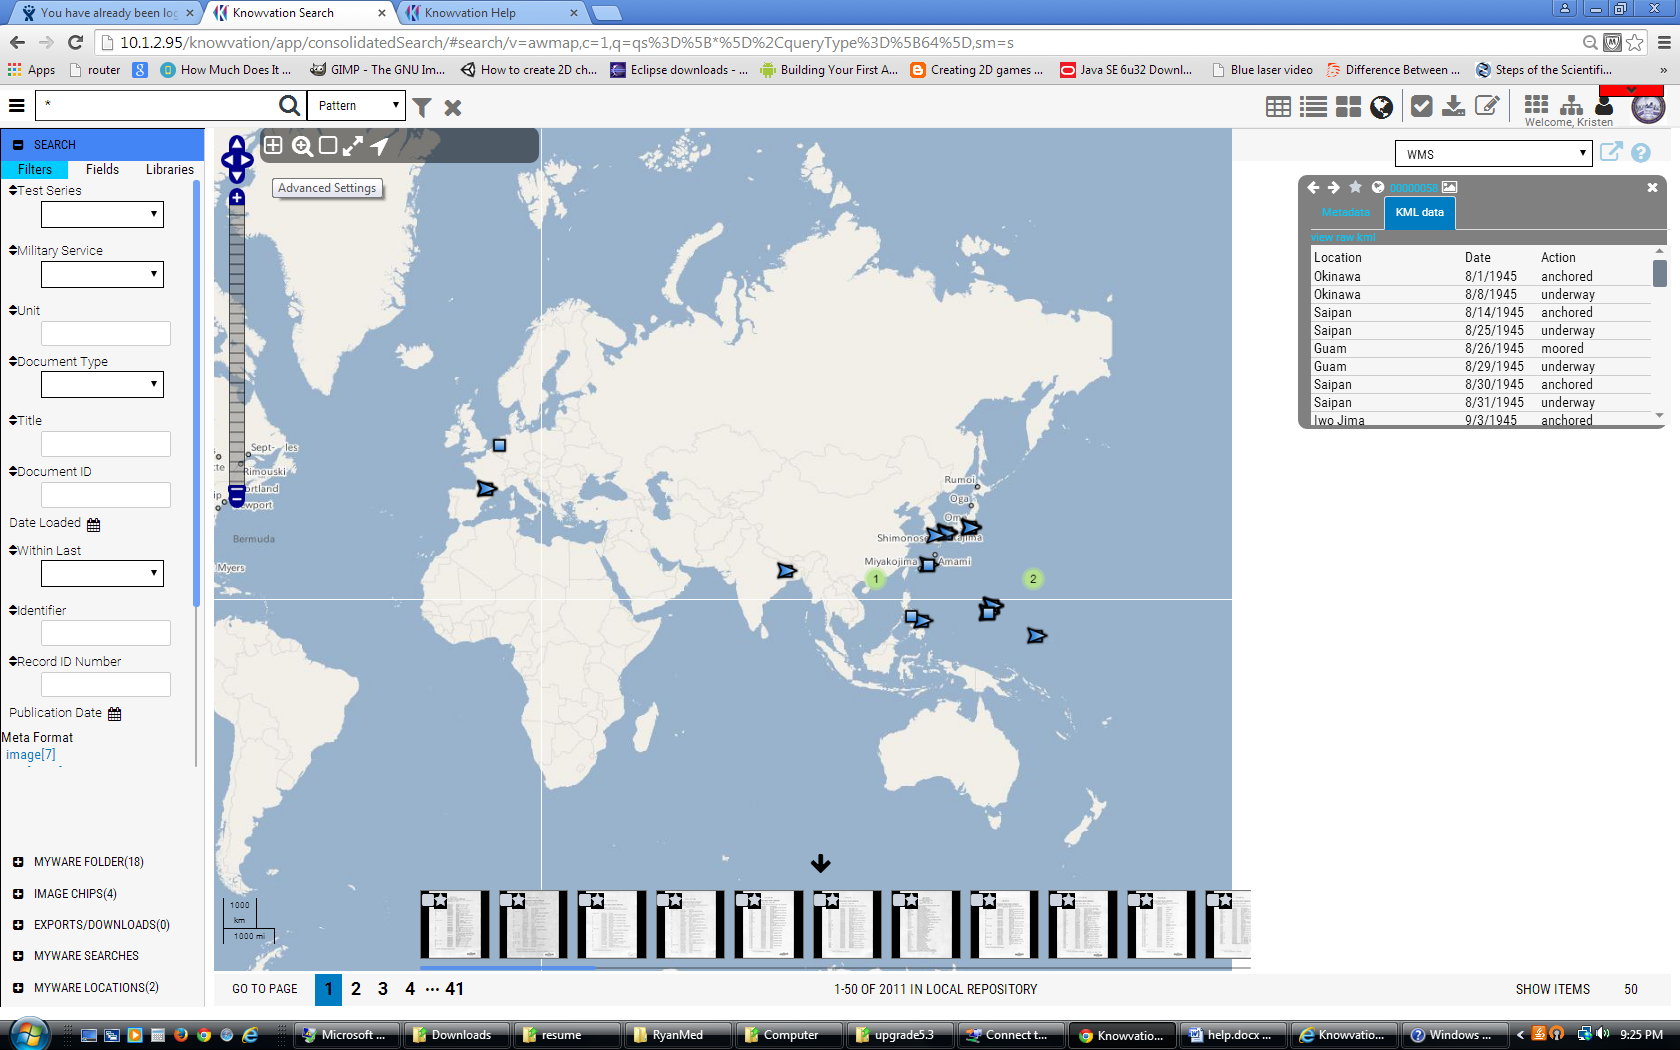
The map view allows you to view documents and where that document's geospatial location places it on earth. You can zoom in and out of the map, search a bounded square area for records, expand the map to full size, and find a location using the controls in the upper left corner of the map overlay.
In order to search a bounded square area for records, choose the square icon in the upper left corner of the map overlay. Then select the upper left point on the map to be bounded and drag to the lower right point. Search performed at this point will be limited by the bounded region.
Clicking on the map circles on edges of the polygons will open a modal dialog with the selected record in the right corner of the screen. Additionally, selecting the thumbnails at the bottom of the screen will open a dialog for the document selected.
Advanced Settings
If you select the box, with the plus sign inside it, located at the top left corner of the map overlay, you have access to multiple overlay features.
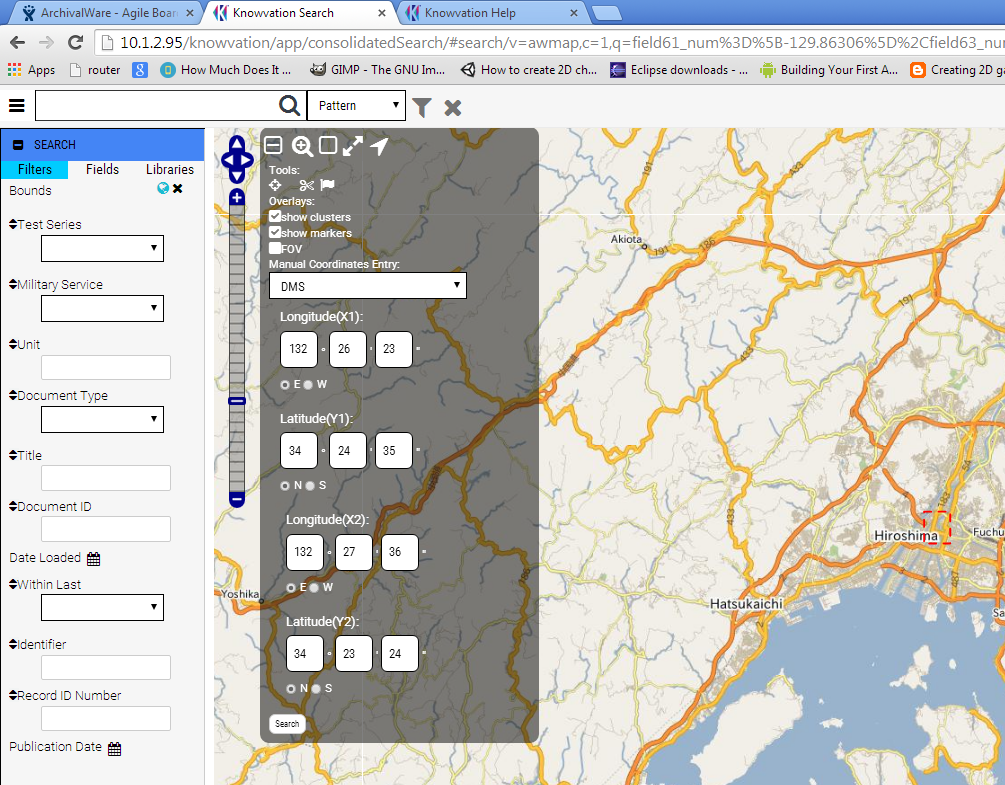
Coordinate Field Search
You may search records by manually typing in coordinates in the manual coordinates entry panel. Suppose you are searching for a record that has longitude of approximately 70 degrees. Type in following coordinates Longitude(X1): 69 , Longitude(X2): 71, Latitude(Y1) : 89.999, Latitude(Y2) : -89.999 and hit search button in the lower left corner. Your search will be constrained with appropriate boundary box. Hover over the globe in the Pagination panel to see the visual representation of your geospatial constraint.
Understanding your results on the map
In Knowvation every element that is geo-referenced gets a single point (that controls which geo cluster the element is assigned to) and an optional shape (rectangle or more complicated shape) to represent coverage.
1) When user searches for items on the map the search is executed against the intersection of the search area with the document shape structure.
2) When the search results are displayed on the map, they can be portrayed in several ways:
- Clusters
- Shapes
- Both
Clusters:
When clusters are displayed, the results are grouped into a geo cluster that is displayed as a dot with a number on the map (each dot represents an area (the area is visible as a green dashed outline when hovering over the dot with the mouse)). A cluster represent all records whose cluster point is within that area.
Shapes:
When shapes are displayed, the system will display the shape that is assigned to the record (single point, or an actual polygon). Note that shapes only become visible as the user zooms in - since when the zoom level is too high it doesn't make sense to show small shapes. Individual points are only shown at the close zoom levels.
Both:
When both are displayed, the system will show clusters for items that are are not visible as shapes (due to zoom level) and it will show shapes for the items that should be visible as shapes for the current zoom level. When both (clusters and shapes) are shown the cluster number may differ from the cluster number displayed for clusters only. This is because all shapes that are visible will be subtracted from the cluster number.
Chipping:
Chipping an image allows you to select a portion of the image overlay and save that highlighted portion. You can chip a document by selecting the scissors icon, which will turn red when selected. Then highlight the portion of the image that you would like to chip. Select the Chip button and your chip download should appear under the advanced search panel in the image chips section.
Note:
In addition to general rules there is also a couple of flags in the system.
For each individual record metadata can be set to showShape=false - that means that even though that record will be found on the map via geospatial search - its shape on the map will not be shown until its selected from the result list.
There is also a global showShapes flag that control default map behaviour. When the flag is set it means show shapes are now drawn on the maps unless the record is selected.
An example scenario where showShapes should be set to false is when the document shape (like a ship travel log) is a multi point shape. It does not make sense to show all of the points for different documents together. In fact a user would only want to see the points for one document at a time. In such cases the shapes are only used for searching.
Map Markers/Locations and Bookmarks
The marker capability allows a user to save or "mark" a location on the map.
In order to save/bookmark/mark a location on the map the user can use the marker icon (that looks like a flag) in the map tools dialog. After toggling the flag icon, clicking or drawing a rectangle on the map will prompt a dialog to save that point or rectangle.
The saved location will appear under "MyWare Locations". Also, the location will be displayed on the map. To turn on or off the display of the saved locations on the map - the user can toggle or un-toggle the "show markers" check-box in the map tools panel.
Document Viewer
Single and Multi Mode
Some documents have single page view and multi-page view options. In single page view you can look at each page one at a time. In the multi-page view you can scroll through all the pages from that document.
Annotation View
Above the single and multi mode options are the default document view and the annotation view (eye icon with strike through it). Selecting the annotation view allows you to access the redaction capability. You can mark up the document using the rectangle and polygon tools and apply annotations. The document will be updated permanently when you choose the replace option.
Printing and Exporting
This is where you can print the document you are viewing or you can download it. We provide multiple download options so that the user has the ability to download single parts of the document or all of its parts such as the actualy file, metadata associated with it or an overview of the file. The metadata download will be a .xml file and the overview will be a pdf.
Metadata Edit
This is where you can change various metadata information associated with the document you are currently viewing.
Document History
This is where you can view the history of changes for this document and which user made the changes.
Feedback
This feature allows you to send feedback about the document to the administrator.
My Content
MyWare Folder
If you want to favorite documents so that you can have easier access to them, they will be placed in this folder.
Image Chips
This is where your chipped image downloads are stored.Chipping an image allows you to select a portion of the image overlay and save that highlighted portion.
Exports and Downloads
If you want to export/download documents you can select any number of documents by selecting the check box associated with that document. Then select the icon in the top right that looks like a downward arrow (search results actions). Select the export results option. Fill out the form to your preferences and select export. The selected documents download will be saved in the exports/downloads section which can be found under the advanced search panel.
Myware Searches
Saved Searches
After favoriting a search that's in the Recent Searches section, those favorited searches will be placed here for easier access.
Recent Searches
This is where all the recent searches are saved. If you would like to save these searches for later use, you can select the star icon and it will move the search into the Saved Searches section.
MyWare Locations
On the map view, select the icon that looks like a square with a plus sign inside it. Select the flag icon and it will turn red to show that it has been selected. Now on the map you can click and drag to highlight an area that you would like to be saved under the myware locations section in the advanced search panel.
Creating Content
Create Record
Using the create feature allows you to import a document and assign metadata to it yourself.
Load Records
Using this load records feature, you can import a document to a specific library. This document that you want to import can be on section server where the system is installed on or on your own computer.
Logs
Here you can view all the document load information such as the time of the import and if it imported successfully or failed.
Manipulating Content
Edit the Search Results
Selecting the pencil icon allows for a number of options for editing search results.
Edit Records
Here you can edit a records specific field values. You also have the option of selecting the replace tab where you can do a text search and replace for a specific field.
Generate Thumbnail
If you want to generate thumbnails for documents you can select any number of documents by selecting the check box associated with that document. Then select the generate thumbnail option.
Rotate Image
If you want to rotate all images for documents you can select any number of documents by selecting the check box associated with that document. Then select the rotate image option and appropriate selection for degrees of rotation.
Edit Browse Structure
Provides the ability to modify the browse structure of selected records. Can move records to a different browse path, or create a new browse path.
In order to use this feature, the user must select the records whose browse structure is to be changed via the checkbox. Then select the Edit Browse Structure feature from the "Edit the search results" menu. After this, the user must choose the new browse structure via the popup modal and select ok.
Delete Records
Records can be deleted by selecting multiple records via the checkbox then selecting delete records. Additionally, records can be deleted within the document viewer.
Side By Side View
Provides the ability to view simultaneously and delete documents. The feature can be accessed by selecting multiple records via the checkbox and then selecting the Side by Side View in the drop down menu under edit the search results option. The wastebasket will delete the document below.
Search Results Actions
Selecting the arrow icon allows for a number of actions on search results
Exporting Results
Export selected records, or all results via FTP or HTTP download. Download is high configurable and includes options such as package name, ability to convert records, aggregate metadata into a friend format, and more.
Emailing Results
Provides the ability to email search results via text, HTML or CSV formats.
User Registration
Select register here if you need an account, otherwise login using your account username and password.
Login
Enter your username and password to login.
User Preferences
User Account
Username
Displays the user's Knowvation login name. Should not exceed 30 alphanumeric characters. (required field).
First Name
Sets the user's first name (30 character maximum).
Last Name
Sets the user's last name (30 character maximum).
Sets the user's e-mail address. (30 characters maximum). This value appears as the FROM address when the user sends email from the Knowvation.
Phone Number
Sets the user's phone number
Language
Sets the language of the user interface.
Authorization
Displays the user's current permission level. This setting is inherited from the group's authority level setting.
Group Id
Displays the user's current group assignment. Users may only be members of one group at a time.
Change Password
Old Password
For security reasons, enter your old password.
New Password
Enter your new password. All characters are permitted.
Verify Password
Re-enter your new password. To successfully change your password, the "New Password" and "Verify Password" must match.
Search Preferences
Use the Account Preferences to change search properties, result list properties, document viewing properties, and International properties.
Search Settings
These settings allow the user to calibrate the nature of text searches.
Query Type
Pattern Search, Similarity Setting
Use this setting to control how closely the pattern of a result term matches the pattern of a query term.
Search Interface Type
Default -- Pre-selects "Google - Satellite" in the menu on the Map search interface.
Google Earth -- Pre-selects "Google - Physical" in the menu on the Map search interface.
Google Earth EE -- Pre-selects "Google - Hybrid" in the menu on the Map search interface.
ESRI Map -- Pre-selects "Esri World Imagery" in the menu on the Map search interface.
Result Settings
Number of hits to browse at a time
Allows you to change how many documents you are displayed on your screen per results set. The default is 25 hits per results page. If there are more than 25 hits you will have to click 'next results' to view the next list of 25. To change this preference use the pull down list and choose a different number.
Number of Sentences
Governs how many sentences are displayed in the search results list if the Summary Type option is set to Top Lines. The default value is 2.
Maximum Number of Documents to Retrieve
This sets the maximum number of document hits retrieved for any given search by this user.
Show File Size
Determines if the size of the file is displayed within the search results list.
Summary Type
Governs the way that search hits are displayed in the results list. The default value is None.
Result Display Format
Determines how the Search Results List is displayed.
Column format -- Search results will be displayed in a table with metadata columns (x-axis) and documents (y-axis).
Row Format -- Results will display in a list of metadata values.
Thumbnail Format -- Results will display as large picture icons with the filename in a matrix (suitable for Photograph collections).
Thumbnail Row Format -- Results will display in a list with a thumbnail image followed by metadata values.
Maximum Sentence Length
Governs the maximum length of the sentences displayed in the search results list if the Summary Type option is set to Top Lines. The default value is 200.
Coordinate System
Specify what coordinate system you like to base your searches on if using coordinates
Sort By
Sort By allows you to sort your results list by relevancy rank. To sort in descending order turn on the checkbox next to descending (to the right of the sort). To sort in ascending order turn off the checkbox next to the work descending.
View Settings
Highlight Field Text
Determines if search hits are highlighted inside retrieved metadata fields. The default is on. To turn off, click on the check in the checkbox so that it disappears.
Highlight Document Text
Determines if search hits are highlighted inside retrieved PDF documents. The default is on. To turn off, click on the check in the checkbox so that it disappears.
PDF Display Style
Determines how a PDF document is downloaded and displayed.
Single Page View -- Downloads one page at a time and displays hit highlighting.
Full View -- Downloades all pages at once; hit highlighting is disabled.
Document Markup Style
Determines the default search hit highlight markup style for text documents.
HTML -- Shows color-coded hit highlights in the document body and metadata.
XML -- Shows color-coded hit highlights in the document body and metadata. Also displays a hit highlight navigator in the document metadata allowing the user to jump from hit to hit.
TXT -- Does not highlight search hits.
Editor Style
Determines which version of the web editor is displayed.
Short Form -- an abbreviated version of the editor template.
Long Form -- an expanded version of the template.
Individual Form -- a form customized for a specific user.
International Options
Specify properties about the language used for searching. These settings apply to the current search session only.
Match Language
If checked, indexed terms will match query terms only if they are in the same language.
Query Language
Specifies the language you'll be using when you enter query term(s) in both the Search For box and in the search fields.
Expansion Language
This setting determines which languages will be used to expand your query terms. By default, the Query Language you chose is selected and will automatically be used for expansion.
Fields
Control whether fields are made available for search, displayed in the query results, and displayed for each document.
To quickly include or exclude all fields in Search, Result, or View, check or uncheck the box at the top of that column.
Search
Put a check mark in the Search column to make that field available for Field Search.
Result
Put a check mark in the Result column to make that field's value displayed in the results list.
Libraries
Expand or limit your search by including or excluding libraries from the list shown. Note that if you do not have permission to search a particular library, it will not be shown in the list.
To include a library in your search, and all future searches, check the box in the row for that library.
To exclude a library from your search, and all future searches, even after you log out, uncheck the box in the row for that library.
To quickly include or exclude all libraries, check or uncheck the "All" box at the top of the column.
Delivery Preferences
Configure your delivery email or ftp settings here.
RSS
Follow your favorite searches using the RSS function. Save a search to MyWare, then go to the MyWare Searches panel. From here you can subscribe to this search, and provide an email that receive notifications for this feed.
Administrator Preferences
Map Layer
Configuring maps layers is quite easy. You can add or remove layers from the map_configuration.js file, which can be accessed at the root level, followed by going into the js folder. Once opened, locate the section that contains the list of layers. Then simply add/remove desired layers. Make sure to follow the correct structure as follows:
layers: [
{
position : "WMS",
openlayer : "WMS",
title : "WMS",
config : {
instantiation : {
layers : 'openstreetmap',
region : 'some region'
},
url : "http://urltomap"
}
},
{
position : "Google",
openlayer : "Google",
title : "Google - Satellite",
config : {
instantiation : {
numZoomLevels : 21,
type : 'google.maps.MapTypeId.SATELLITE'
}
}
},
{
position : "ESRI",
openlayer : "ESRI",
title : "ESRI World Imagery",
config : {
instantiation : {
wrapDateLine : 'true',
numZoomLevels : 21
},
url : "http://server.arcgisonline.com/ArcGIS/rest/services/World_Imagery/MapServer/tile/${z}/${y}/${x}"
}
}
]
You can comment out any other map layers if you want a single layer to be used at all times. If you require more detailed information on individual layers, please visit their respective web sites for help.
Note that the ESRI tile layers require ${z}/${y}/${x}
Google Layers
There are 4 google layers types. SATELLITE, TERRAIN, STREET & HYBRID. The layers can be changed by configuring the type object : google.maps.MapTypeId.{type}.
If you want to use any of the Google Layers, the GOOGLE_URL must be set.
If your Knowvation install cannot connect to the google website, then the GOOGLE_URL property must be commented out or set to NULL.
GOOGLE_URL : "http://maps.google.com/maps/api/js?v=3.2&sensor=false"
Disabling/Enabling Anonymous User
In order to enable or disable anonymous user login please open "ArchivalWare\rware\jboss-5.1.0.GA\server\rware\deploy\awweb.war\WEB-INF\classes\rest\rest-security-config.xml" configuration file and change the following line to enabled to "true" or "false":
<user username="public" password="public" usertype="anonymous" enabled="false"/>
Show Rank in the Search Results
In order to disable the 'rank' column in the Grid view, and in the List and Thumbnail Views, you'll need to change the SHOW_RANK property to false,
SHOW_RANK : false
Filters trigger search
Due to possible network limitations, searches after every filter change may not be ideal. Setting Explicit search required to false forces the system to only search when the user hits a "search" button, as opposed to on filter changes.
EXPLICIT_SEARCH_REQUIRED : false